Sunday, May 31, 2015

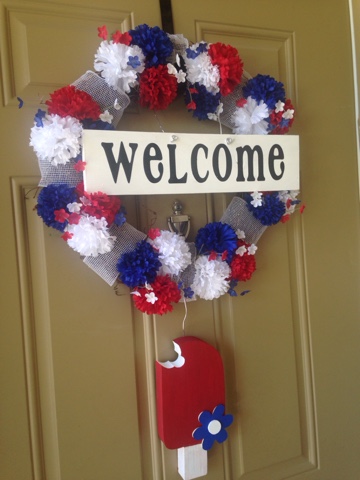
4th of July wreath!


Alright here we go! So I had a totally different vision but sometimes you get new ideas and change everything ;p
First, I purchased the welcome sign and popsicle, ribbon, and wire from Wood Creations Crafts. Such an adorable store!!  I got the paint, modge podge, brushes, and glitter from Michael's. 


((Here's my finished Popsicle: TAKE 1!))


       Side note:: my daughter loves crafts just as much as I do. Makes my heart happy! So we both get to be creative together. Except I don't get to be naked when I do them. Haha. 


Okay back on track, the other day I decided to stop by Michael's (which can be very dangerous) & ended up with all these goodies to make a wreath! I decided on red, white, & blue for Summer. Nothing says Summer like 4th if July!! 

•flowers on sale $1.99 each (I picked out bigger flowers and smaller. For one exactly like this you need to buy 3 of the larger and 2 of the smaller ones)
•glittery deco mesh $3.99
•18" wreath circle $2.99 (originally $4.99 but used a 40% off coupon found on their website) 


Then I decided on repainting my Popsicle red. Good thing it wasn't a huge pain because I like it a lot better! I just sanded it a little then used red acrylic paint purchased from Michael's for .69 cents. I always like to lay out a few things and change it around a little bit to get an idea of what I'm going to do before I hot glue it all. 


Here's a work in progress... I just hot glue the stem of the flower and stick it to the wreath. How you want to arrange your flowers is totally up to you!


Here's the flowers and deco mesh all finished! If you just wanted to stop here, the wreath would cost you under $20 :)


Just an FYI: I indivually cut each piece of deco mesh and hot glue it. This save a ton on product!


Then I attached the welcome sign and Popsicle with wire and a little hot glue & here's a great wreath for the Summer!!


Thanks for checking out my blog! Happy Sunday & happy crafting! :)

Thursday, May 28, 2015

Redecorating on a budget


Sometimes you just feel like you need a change. 
And what better way than a little redecorating & retail therapy :)

Heres a little before. My mom was nice enough to lend us her old couch 
When we moved back from Colorado and sold our old one. 
It's a nice couch but HUGE! It literally took up our whole family room!!!


Here's after! A smaller couch and look at all the room!! 


I just want to post a few things I bought for anyone
Who might be looking for something in particular! 
I love love Pinterest and IG so I find a lot of ideas from there.

I purchased this 5 tier leaning shelf from Target for $97!


Just added a few 'homey' touches :)
Nothing says home like photos! 


Got this black tufted accent chair from Target as well!
On sale for $125!


White pillow - Target $25
Throw blanket - Target $19.99
Chevron basket - Hobby Lobby $18

(I love buying / making blankets so a
Basket is so perfect to throw them in)


I couldn't find the original pictures on the website but this is a collage I made before redoing anything.

•sofa - Walker Furniture Warehouse

•curtains - Target ONLINE : I have high ceilings so I had no choice but to order the 54x95" online. 

•rug - Target ONLINE - seriously the best deal out of anything I bought!!! $135 for an 8x10 rug! Thanks to my hubby who got it for me for Mother's Day. He always knows just what I like ;p


I bought these at Home Goods.
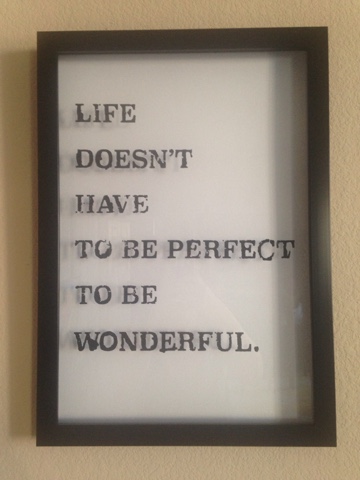
I just love the sayings!
Nothing like uplifting quotes.


I had a really hard time finding couch pillows, I knew I wanted stripes but did not want to pay $50 for 2 pillows which is all I found online 😁 so I actually got lucky and found the black ones and stripes at my favorite home store ever, Rod Works for $12 each!! 

Amour pillow (it's also reversible to black) - Target $19.99

(This is my puppy Opie)

These are the basics! 
Everything else I already had somewhere around my home so I'll do my best to remember where everything is from

• metal rod - Rodworks


•Side ta
ble - Home Goods
(I changed it up a little!)


• coffee table - Walmart 
•Mirror - Home Goods 

•MARSHALL sign - Far West Furiture 
(This is my favorite thing in my house)

& that's it! 
Enjoy your shopping!
It's good for the soul :) 


Sunday, May 24, 2015

DIY: {how to: TUTU} step by step


I'm sure there are a million different tutorials on how to make a tutu
But if you like mine, here's a step by step! 

(Headband - ETSY simplychiccouture)
(Customized shirt - ETSY hpthreads)


All you need: •tulle •ribbon •scissors 

First, I purchased 6 yards of tulle from Joanne's fabric for .99 cents a yard. Awesome deal! 
FYI: This is for a 2 year old, so older kids may need more tulle!

Lay out your tulle and fold in half.


I individually cut each piece about an inch in size. 
I'm all about non perfect crafts
So I didn't bother to measure each piece perfectly, 
but if you'd rather do it then go for it :) 


After you finish cutting all your tulle, then take one piece at a time
And cut in half. (As shown) so then you'll have double the tulle. 


In between step : I measured my daughters waist with
The ribbon I purchased, while leaving a little extra to tie a bow. I then tied the ribbon around a chair to keep it secure. 

•SIDE NOTE: I've also used elastic before! If that's what
You'd rather use than ribbon!


Moving On... the next step is take 2 pieces of tulle, (for a fuller tutu) & Wrap over the ribbon (or elastic)


Make a loop


Pull tulle through the loop and make a tight knot


It should look like this :)


Again, I wanted this tutu to be flowy and whimsical, so it's all about preference! If you wanted a thicker looking tutu, you can tie a few of the same color side by side. 

Here's the final result!


Photo by: 
Michelle Coronado Photography


Thanks for stopping by!
Happy crafting!
Xoxo, Sam